File GeoDatabase to PostgreSQL (PostGIS)

GDAL, amongst other programs includes the ogr2ogr. The ogr2ogr program can be used to convert simple features data between file formats performing various operations during the process such as spatial or attribute selections, reducing the set of attributes, setting the output coordinate system or even reprojecting the features during translation.

In case you have Windows, you need to use the CMD to use ogr2ogr. In case of MAC or Linux you can run it via the terminal. Normally, if you have QGIS, you should already have ogr2ogr (you can assess this typing ogr2ogr in CMD terminal). Find more details on the ogr2ogr in the gdal documentation.

In this blog post we will use the ogr2ogr in order to import a File GeoDatabase (FGDB) into a PostgreSQL database.

Feature Classes Check

The first step is to check the status of the FGDB and see which Feature Classes are included. You can do this using the ogrinfo as per below:

ogrinfo geodbname.gdb

If everything installed correctly you should be able to see all the Feature Classes in the GeoDB, even if they are within and Feature Dataaset. More info on the ogrinf in the gdal documentation.

FGDB Import in the GeoDB

ogr2ogr -f "PostgreSQL" PG:"host=localhost port=5432 dbname=<<DB_NAME>> user=<<USERNAME>>" geodbname.gdb -overwrite -progress --config PG_USE_COPY YES

Since you already have checked the access to the .gdb, in case you get any error, most likely something is wrong on the GDAL installation. Check the type of error and act accordingly.

The ogr2ogr program imports all the feature classes in the geodatabase if it used as above. This includes classes within the Feature Datasets. It saves them under the public schema of the defined database.
ArcSDE licensing

I was really curious about the ArcSDE licensing and tried to find some information in the internet about it. In my opinion it is very weird that the Enterprise GeoDB creation requires keycodes (Authorisation file) from ArcGIS Server  software and that there should be another way to do so. But after digging and surfing, there is not much information about that topic.

On this gis.stackexchange Question (answered on August of 2015) it is mentioned that:

“Esri incorporated ArcSDE into ArcGIS Server with the release of ArcGIS 9.2. In order to deploy ArcSDE technology as an enterprise geodatabase you must have, or be prepared to purchase, an ArcGIS Server license. Since the introduction of ArcGIS 10.0, the actual enterprise geodatabase installer lives within ArcPy, and can be invoked either as an ArcToolbox tool or directly from Python.”

Checkin on the Create Enterprise Geodatabase tool documentation for the authorization_file option, it is explained as:

“Provide the path and file name of the keycodes file that was created when you authorized ArcGIS Server. If you have not already done so, authorize ArcGIS Server to create this file.”

Also, in this GeoNet post (from 2011), it is mentioned that:

“You cannot purchase a license for ArcSDE. Since 9.2, the ArcSDE application server is a *part* of the Enterprise ArcGIS license.”

Finally, in this ESRI community post, it is explained on details what to do with the authorisation file (in case you miss it) and it notes that:

“NOTE: You must have authorized ArcGIS Server to create the keycodes file ahead of time!”

So, it is clear that there is no separate installation any more for ArcSDE and that this could be done via ArcGIS Desktop software (ArcMap or ArcGIS Pro). Nevertheless it is required to have ArcGIS Server licence in order to be able to create an Enterprise Geodatabase.

Theory & creation of GDB using PostgreSQL

ArcSDE

ArcSDE (Spatial Database Engine) is a server-software sub-system (produced and marketed by Esri) that aims to enable the usage of Relational Database Management Systems for spatial data. The spatial data may then be used as part of a geodatabase (wiki source).

While traditional RDBMS software keeps track of the tables and records contained in the database, ArcSDE pushes the relational model higher so that client software can manage geographic data – which comprise several tables – seamlessly. The user need have no awareness of nor dealings with the particulars of the RDBMS. The GIS environment routes all connections to the database through the ArcSDE middleware, which manages the storing and retrieval of data (wiki source).

Geodatabase

The geodatabase is a “container” used to hold a collection of datasets. There are three types:

  1. File geodatabases—Stored as folders in a file system. Each dataset is held as a file that can scale up to 1 TB in size. The file geodatabase is recommended over personal geodatabases.
  2. Personal geodatabases—All datasets are stored within a Microsoft Access data file, which is limited in size to 2 GB.
  3. Enterprise geodatabases—Also known as multiuser geodatabases, they can be unlimited in size and numbers of users. Stored in a relational database using Oracle, Microsoft SQL Server, IBM DB2, IBM Informix, or PostgreSQL. This one requires the use of ArcSDE technology.

There is a comparison matrix on the ESRI documentation, where you can see all the details and differences between them.

Essential readings about the geodatabase can be found in this ESRI documentation. We will skip a big part of the documentation to go to the actual creation of the Enterprise geodatabase by connecting to the PostgreSQL.

Get started with geodatabases in PostgreSQL

The main tutorial to follow is this from ESRI documentation. It is very important to have a look on the PostgreSQL database requirements for ArcGIS 10.6.x in order to check the compatibility between the versions. In my case I do not have the minimum supported (PostgreSQL 10.3 & PostGIS 2.4) but I have PostgreSQL 10.5 & PostGIS 2.5. It says in the documentation “Newer minor versions are supported but are not certified”. So lets test it.

During creation of the geodatabase there is a more detailed description here. While running the “Create Enterprise Geodatabase” geoprocessing tool I entered the following options:

  • DB platform: PostgreSQL
  • Instance: localhost
  • Database: myfirstgdb
  • Tablespace Name: <empty>
  • Authorization file: C:\Program Files\ESRI\License10.4\sysgen\keycodes

After finishing I can check in pgAdmin that the myfirstgdb geodatabase exists! The next step is to create a user to own data as described in ESRI documentation. Data stored in your geodatabase should be owned by users other than the sde user. Use the Create Database User geoprocessing tool to create a user in the PostgreSQL database cluster and a schema in your new database.

First step is to create a database connection to the newly created database. In the add Database connection menu select:

  • DB platform: PostgreSQL
  • Instance: localhost
  • Database: myfirstgdb

Now run the Create Database User tool. Very straightforward procedure as well. Once again you can check this via pgAdmin.

Now that you have a user who can add data to your new geodatabase, connect to the database as that user. The easiest way to do that is to alter the connection file you created earlier. A small test is to try and import some data to “myfirstgdb”.


Importing OSM data in PostGIS from shapefile & apply OSM styles

On the previous post we added multiple shapefiles to PostgreSQL with a python script and the use of the shp2pgsql. Now we will take it one step further in order to be able to have open street map (OSM) data in the PostgreSQL database. There are several ways and file formats to do so, but I selected the shapefile because is one of the most commonly used GIS file type.

First step to do was to download the OSM data for my area of interest. I downloaded the OSM data for Delft, NL from the bbbike.org. You can also use the geofabrik.de. It is a straightforward process. All you need to do is to define the bounding box polygon and then the file is created. Download/Save/Unzip and you are ready.

Use the same script from this previous post to add all the layers in the database. Based on the size of Delft the, import took less than 10sec.

Now that the data are in the db import them in QGIS as indicated in this previous post.

There are several OSM styles to be used in QGIS available in several sites. Nevertheless it is really important to use the ones that fit the imported data type in the database. In my case I downloaded and used the styles (QML) from this site. It contains QGIS stylesheets (QML) for use with OpenStreetMap (OSM) data in ESRI Shapefile format. List of styles can be found also wiki.openstreetmap.org.

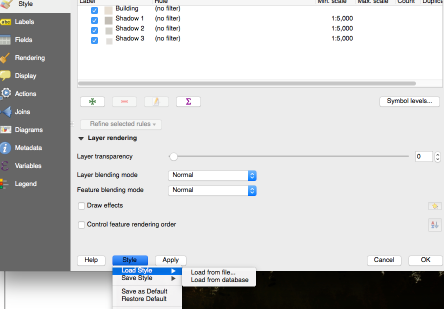
Import style

Import style to QGIS


Please note the recommended layer order.

For background polygons you can use (as suggested) the OSM land-polygons and the OSM water-polygons. Styles for those are included in the styles package.

After importing the result looks amazing! Of course there are some changes to happen in order to reach the OSM style precisely. But this is up to each user. For example I didn’t like the given background colour of the land polygons and I changed it to the one used in the openstreetmap.org which is the #b8d9f7 and not the #dddde8 originally used. You can check this change in the last image bellow.