As discussed previously there are several ways to import OSM data in a PostgreSQL database. In this post I will explain the most complete (in my opinion) way, which is using the osm2pgsql. In this way we can achieve creating an OpenStreetMap Tile Cache Server.
Details on the osm2pgsql can be found in the github page of the tool, in the wikipedia page of OSM and in this detailed usage description of the tool. Also, the procedure (for Linux Server) it is explained on this blog-post by Boundless and in this blog-post.
At the same time, I wanted to install the full solution in Windows so I started from scratch. The versions used in this tutorial are: Windows 7 SP1 64Bit / PostgreSQL 10.5 x86_64 / pgAdmin 4 v3.4 / PostGIS 2.5 / GeoServer 2.14
PostgreSQL installation
So, I started from scratch by downloading PostgreSQL from this site. Follow the installation as it goes. After installation you should allow the Stack Builder to open. During installation of PostGIS, I selected to create a PostGIS Sample (with default name).
OSM data download
Nest step was to download the OSM data from extract.bbbike.org. I selected a part of The Netherlands which includes Rotterdam, Den Haag, Delft e.t.c. Please note that data should be with the .pbf extension.
osm2pgsql installation
In order to use the osm2pgsql we have to download it from here. Unzip the file on your system. You should move the unzipped folder to a location where you will not move it later, because we need to add its location to the system path. Open the “Edit the system environment variables” and click on “environment variables”. At the bottom find the variable named “Path” and click “Edit…”. You must add the directory where osm2pgsql.exe is located to the Path variable. In order to check open Command Prompt and type osm2pgsql.
Prepare the Database
By accessing the pgAdmin and the Databases I created a DB based on the sample created while performing PostGIS installation. Just to be sure that the necessary extensions are available, create SQL script with the below:
CREATE EXTENSION postgis;
CREATE EXTENSION postgis_topology;
CREATE EXTENSION hstore;
Download style file
In order to have similar styles to the OSM in several websites we have to use style files. Download the mapzen_osm2pgsql.style from here. Save under the working folder.
Preparing and running the osm2pgsql
The osm2pgsql has several options which are explained quite well in the websites I already mentioned. The process of importing the data using the below command for the described region took 306 sec.
osm2pgsql -c -d <<DB name>> -U <<USER NAME>> -H localhost /Users/--<<style FILE PATH>>--.style/Users/--<<style FILE PATH>>--.pbf
In case the .pbf file is very big, there are a few options to be included, like cache, slim mode or flat-nodes. More details on the before mentioned osm2pgsql links.
In case the style file is not recognised, follow those steps:
- open the default style (lies in the osm2pgsql folder)
- copy (ONLY) the style details from the style file you want to use and copy it to the default.
- Save as different name and use this file
We can verify the import by checking in the pgAdmin the database/Schemas/public for the tables to be created. There should be tables like below:
- planet_osm_line
- planet_osm_point
- planet_osm_polygon
- planet_osm_roads
- spatial_ref_sys
Background data using shp2pgsql
The next step in creating our tile cache server is to load an ocean dataset to use in conjunction with the OSM data. Download the full Oceans Polygon (mercator) from this link. Alternatively to the full size shapefile you can use the simplified files. We can also add the land polygon. Unzip water-polygons-split-3957.zip file and then we have to use the shp2pgsql command. In order to use the shp2pgsql from any folder we have to set the environmental variables as explained above for the osm2pgsql. Then prepare and run the below shp2pgsql command on the Command Prompt window.
shp2pgsql -g geom -s 900913 -I -D ./water/simplified_water_polygons.shp ocean | psql -U <<USER NAME>> <<DB NAME>>
In case you use also land polygon:
shp2pgsql -g geom -s 900913 -I -D ./land/landpolygons.shp land | psql -U <<USER NAME>> <<DB NAME>>
Based on the shp2pgsql enter of the polygons we did, the EPSG will be 900913. You can check this by using the below on a DB script:
SELECT Find_SRID('public', 'ocean', 'geom');
--in case of land polygon use
SELECT Find_SRID('public', 'land', 'geom');
If in any case the shapefile you want to enter are in different coordinate system, then the below sql script has to run:
alter table <<TABLE NAME>> alter column geom type geometry(MULTILINESTRING,900913) using st_transform(geom,900913);
Download the createDBObjects.sql
Next step is to download and run the createDBobjects from this link. You can either run this from the command line or you can copy/paste the queries on the DB script and run it. After this process the tables in our database will be much more.
Install GeoServer and pre-configure
Download the GeoServer software from here and install using all the defaults. Using the GeoServer admin UI, create a workspace in GeoServer called osm with a http://osm.org as namespace.
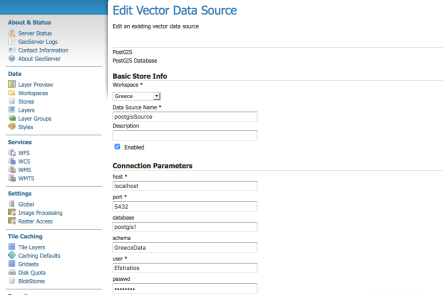
Create a PostGIS datastore called openstreetmap that connects to the osm database in the database.
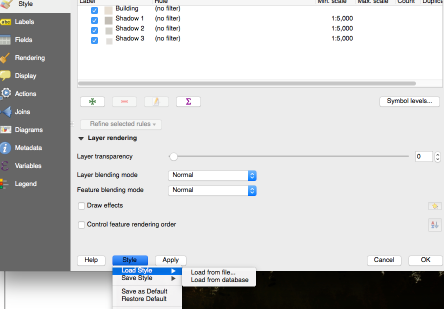
Next step is to create styles and connect them to layers. In order to save time we will use the styles and automatic process as proposed by Boundless. So, we will use the REST API to connect to GeoServer and create layers, symbology, and associate between the symbology and layers.
- Download the SLD scripts to your OSM data directory and unzip it.
- Edit the layergroup.xml to reflect your case. For example the admin0/admin1 layers are not there so, they can be removed.
Cygwin installation and SLD_create.sh run
The file provided by Boundless to import the styles, is an .sh file which runs on Linux machines and MacOS with minor changes. But not in Windows. In a future post I will convert this .sh file in a python file so that it will be usable in any format.
In order to run the .sh file we need to install the Cygwin software. Download here, install & run Cygwin. Navigate to your working folder (sld folder) and check if you can locate the SLD_create.sh file. This file will create the styles and layers in GeoServer, associate the style to the corresponding layer, and then create a group layer that is the base map. You can run the SLD_create.sh using:
bash SLD_create.sh
The SLD-create file includes Curl commands. If Curl is required, you can download curl on this link. In order to use curl from any folder we have to set the environmental variables as explained above for the osm2pgsql.
Once the SLD create script has run successfully you will see the layers and styles in your GeoServer instance. To see the basemap, go to layer preview and find the OSM group layer. It should look similar like below.

Overview of the region

More details while zooming

Delft markt in close detail